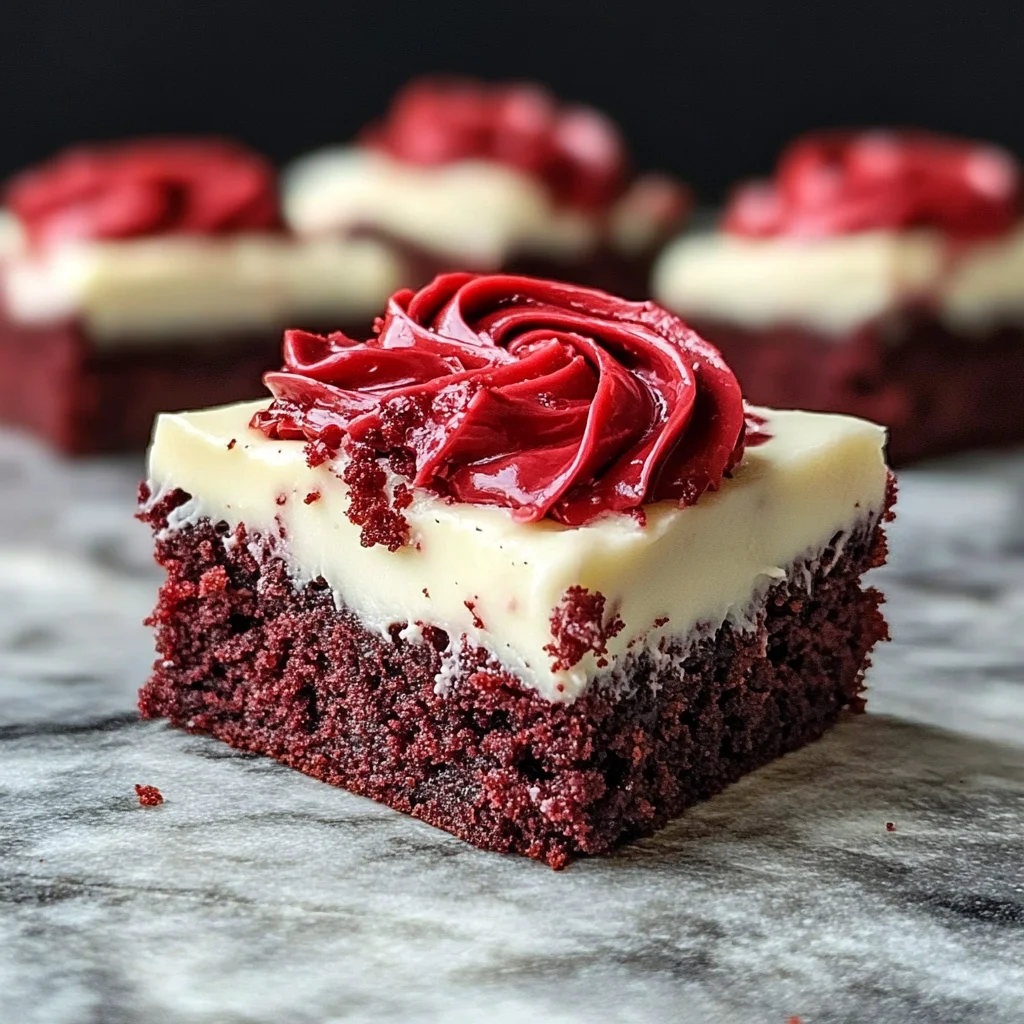
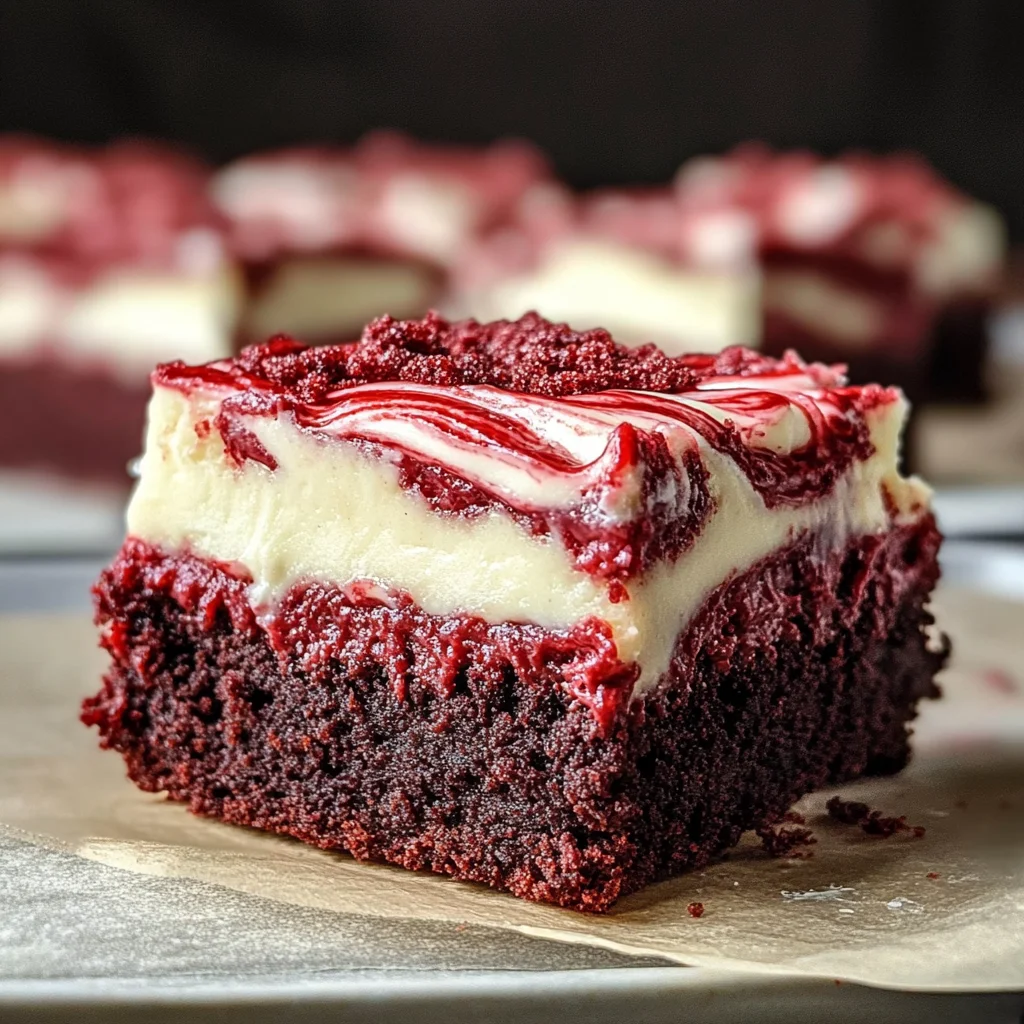
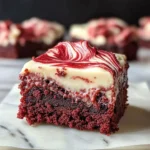
Red Velvet Brownies
These red velvet brownies are a delightful treat that combines the rich flavor of chocolate with the vibrant color of red velvet. Perfect for special occasions or just to satisfy your sweet tooth, they are topped with the best cream cheese frosting. What makes these brownies even more appealing is that they can easily be made dairy-free, accommodating various dietary needs.
Why You’ll Love This Recipe
- Delicious Flavor: The combination of cocoa powder and red food coloring creates a unique taste that stands out.
- Easy to Make: With simple ingredients and straightforward steps, these brownies are perfect for bakers of all skill levels.
- Versatile: Ideal for parties, holidays, or as a comforting dessert at home, these brownies fit any occasion.
- Dairy-Free Option: You can easily modify this recipe to make it dairy-free without sacrificing flavor.
- Creamy Frosting: The cream cheese frosting adds a rich, tangy finish that perfectly complements the brownies.
Tools and Preparation
Before diving into making your red velvet brownies, it’s essential to gather your tools and prepare your workspace.
Essential Tools and Equipment
- 8×8 square baking pan
- Parchment paper
- Mixing bowls
- Whisk
- Spatula
- Toothpick
Importance of Each Tool
- 8×8 square baking pan: This specific size ensures even baking and perfect brownie portions.
- Parchment paper: It prevents sticking and makes it easy to lift the brownies out of the pan.
- Whisk: An essential tool for mixing ingredients smoothly without clumps.
- Spatula: Great for scraping every bit of batter from the bowl and spreading frosting evenly.
Ingredients
These chewy red velvet brownies are topped with the best cream cheese frosting! Plus, you can easily make these red velvet brownies dairy-free so they’re perfect if you have food allergies!
Ingredients:
– 3/4 cup butter, melted (regular or dairy free)
– 3/4 cup light brown sugar
– 1 cup granulated sugar
– 2 eggs
– 1 tbsp vanilla extract
– ½ teaspoon liquid red food coloring (SEE NOTES)
– 1½ teaspoon white vinegar
– ¼ cup cocoa powder
– 1/4 tsp salt
– 1 cup + 3 tbsp all-purpose flour (SEE NOTES)
– 4 oz plain cream cheese, room temperature (SEE NOTES IF DAIRY FREE)
– ¼ cup butter, softened (dairy free or regular)
– ½ teaspoon vanilla extract
– pinch of salt
– 1½-2 cups powdered sugar (icing sugar)
– 2 Tablespoons cornstarch (ONLY IF DAIRY FREE, SEE NOTES)
How to Make Red Velvet Brownies
Step 1: Preheat the Oven
Preheat your oven to 350°F. Line an 8×8 square baking pan with parchment paper. Make sure to leave some overhang on the sides for easy removal later.
Step 2: Melt the Butter
Melt the butter using a microwave or a small pan on the stove. Once melted, transfer it to a medium-sized bowl.
Step 3: Combine Sugars and Butter
Add both sugars into the bowl with melted butter. Use a whisk to mix until it forms a paste that pulls away from the sides cleanly.
Step 4: Add Wet Ingredients
Incorporate eggs, vinegar, vanilla extract, and red food coloring into the mixture. Mix until well combined. Adjust food coloring for desired shade of red.
Step 5: Mix Dry Ingredients
Add in cocoa powder, salt, and flour. Use the whisk to combine everything until just mixed—don’t overmix.
Step 6: Pour into Baking Pan
Pour the brownie batter into your lined baking pan. Use a spatula to scrape all batter from the bowl.
Step 7: Bake Brownies
Bake in preheated oven for 30–40 minutes. Start checking at 30 minutes by inserting a toothpick in the center; you want it to come out with some wet crumbs but not wet batter.
Step 8: Cool and Prepare Frosting
While brownies cool down, prepare your cream cheese frosting following steps outlined below.
Cream Cheese Frosting Instructions:
- In another medium bowl or standing mixer, add cream cheese, softened butter, salt, and vanilla extract. Beat until smooth.
- Gradually add powdered sugar until reaching desired consistency. If using dairy-free cream cheese, add cornstarch as needed for thickness.
- Chill frosting in fridge until ready to use on cooled brownies.
Let your delicious red velvet brownies cool completely before applying frosting! Store either unfrosted or frosted in the refrigerator until served. Enjoy!
How to Serve Red Velvet Brownies
These chewy red velvet brownies are not only delicious on their own, but they can also be enjoyed in various ways. Here are some serving suggestions that will elevate your brownie experience.
With a Scoop of Ice Cream
- Vanilla ice cream: The classic pairing that complements the rich flavors of the brownies.
- Cream cheese ice cream: Enhances the cream cheese frosting and adds a delightful twist.
Drizzled with Chocolate Sauce
- Warm chocolate sauce: A warm drizzle adds extra richness and gooeyness to each bite.
- White chocolate sauce: For a sweeter touch, this pairing contrasts beautifully with the cocoa flavor.
Topped with Fresh Berries
- Strawberries: Their tartness cuts through the sweetness for a balanced dessert.
- Raspberries: Add a burst of flavor and a pop of color on top of your brownies.
As Part of a Dessert Platter
- Mini cheesecakes: Offer variety with different textures and flavors alongside the brownies.
- Cookies: Include assorted cookies for guests to enjoy alongside the brownies.
How to Perfect Red Velvet Brownies
To make sure your red velvet brownies turn out perfectly every time, follow these helpful tips.
- Use quality ingredients: Fresh eggs and high-quality cocoa powder enhance flavor and texture.
- Measure accurately: Use precise measurements for flour and sugar to avoid dense brownies.
- Do not overmix: Mix only until combined to maintain a fudgy consistency in your brownies.
- Check doneness carefully: Use the toothpick test; it should come out with some moist crumbs, not clean.
- Let them cool entirely: Allowing brownies to cool prevents them from falling apart when cut.
Best Side Dishes for Red Velvet Brownies
Pair your delectable red velvet brownies with these delightful side dishes that complement their rich flavors perfectly.
- Vanilla Ice Cream: This classic treat adds creaminess that balances the brownie’s richness.
- Chocolate Mousse: A light yet decadent option that enhances the chocolate notes in the brownies.
- Fresh Fruit Salad: A refreshing mix of fruits cuts through the sweetness and adds brightness to your plate.
- Coffee or Espresso: The bitterness of coffee enhances chocolate flavors, making it an ideal beverage choice.
- Whipped Cream: Light and airy, it provides a nice contrast to the dense brownie texture.
- Milkshake: A creamy milkshake pairs well, especially when made with chocolate or vanilla flavors for added indulgence.
Common Mistakes to Avoid
Making red velvet brownies can be simple, but a few common mistakes can lead to disappointing results. Here are some pitfalls to watch out for.
-
Boldly measuring ingredients: Mismeasuring ingredients can ruin your brownies. Always use precise measurements for both wet and dry ingredients to ensure the right texture and flavor.
-
Ignoring the baking time: Overbaking will dry out your brownies, while underbaking may leave them too gooey. Check for doneness at the recommended time using a toothpick; it should come out with a few moist crumbs.
-
Skipping parchment paper: Not lining your pan with parchment paper makes it hard to remove the brownies. Always line your pan for easy removal and clean-up.
-
Not cooling before frosting: Frosting warm brownies leads to a melty mess. Allow your brownies to cool completely before adding the cream cheese frosting for the best results.
-
Using outdated ingredients: Expired baking powder or old cocoa powder can affect your brownies’ rise and flavor. Always check expiration dates on your ingredients before baking.
Storage & Reheating Instructions
Refrigerator Storage
- Store red velvet brownies in an airtight container.
- They will last up to 5 days in the fridge.
- Keep cream cheese frosting separate until ready to serve.
Freezing Red Velvet Brownies
- Wrap individual brownies in plastic wrap.
- Place them in a freezer-safe container or bag.
- They can be frozen for up to 3 months.
Reheating Red Velvet Brownies
- Oven: Preheat oven to 350°F, place brownies on a baking sheet, and heat for about 10 minutes.
- Microwave: Heat individual brownies for 15-20 seconds on high until warm.
- Stovetop: Place brownies in a non-stick skillet over low heat, cover, and warm gently for about 5 minutes.
Frequently Asked Questions
If you have questions about making red velvet brownies, you’re not alone! Here are some frequently asked questions answered.
Can I make Red Velvet Brownies dairy-free?
Yes! Use dairy-free butter and cream cheese alternatives to create delicious dairy-free red velvet brownies without sacrificing taste.
What makes Red Velvet Brownies different from regular chocolate brownies?
Red velvet brownies have a distinct flavor due to cocoa powder combined with vinegar and buttermilk (or dairy-free substitutes), giving them a unique taste and color.
How should I store leftover Red Velvet Brownies?
Store them in an airtight container in the refrigerator for up to five days or freeze them for longer storage.
Can I add other flavors or mix-ins?
Absolutely! Consider adding nuts, chocolate chips, or even peppermint extract for a festive twist on these red velvet brownies.
Why is my red food coloring not vibrant?
The brand of food coloring can greatly affect the shade of your brownies. Always use high-quality liquid food coloring and adjust as necessary until you achieve your desired color.
Final Thoughts
These chewy red velvet brownies topped with cream cheese frosting are not only delicious but also customizable. You can easily adapt this recipe to fit dietary preferences, making them perfect for any occasion. Try adding nuts or experimenting with different frostings to make these treats uniquely yours!
Red Velvet Brownies
Indulge in the delightful experience of Red Velvet Brownies, where rich chocolate meets a vibrant crimson hue. These chewy treats are perfect for any occasion, from festive gatherings to cozy nights in. Topped with a luscious cream cheese frosting, each bite is a harmonious blend of flavors that will satisfy your sweet tooth. Plus, with an easy tweak, you can make them dairy-free to accommodate different dietary needs. Whether served on their own or alongside a scoop of vanilla ice cream or fresh berries, these brownies promise to elevate your dessert game!
- Prep Time: 15 minutes
- Cook Time: 35 minutes
- Total Time: 50 minutes
- Yield: Approximately 16 servings 1x
- Category: Dessert
- Method: Baking
- Cuisine: American
Ingredients
- 3/4 cup butter (dairy or dairy-free)
- 3/4 cup light brown sugar
- 1 cup granulated sugar
- 2 eggs
- 1 tbsp vanilla extract
- ½ teaspoon liquid red food coloring
- ¼ cup cocoa powder
- 1 cup + 3 tbsp all-purpose flour
- Cream cheese for frosting
Instructions
- Preheat your oven to 350°F and line an 8×8 pan with parchment paper.
- Melt the butter and mix it with both sugars until a paste forms.
- Add eggs, vanilla, vinegar, and red food coloring; mix well.
- Blend in cocoa powder and flour until just combined.
- Pour the batter into the pan and bake for 30–40 minutes, checking doneness with a toothpick.
- Allow cooling before frosting with cream cheese mixture.
Nutrition
- Serving Size: 1 brownie (50g)
- Calories: 250
- Sugar: 22g
- Sodium: 150mg
- Fat: 12g
- Saturated Fat: 7g
- Unsaturated Fat: 5g
- Trans Fat: 0g
- Carbohydrates: 34g
- Fiber: 1g
- Protein: 3g
- Cholesterol: 40mg